Hey everyone, it’s your guide from Blender Aday, here to walk you through the most important tool in your arsenal. Now, when you search for a Ninja Blender Review, you might be expecting something for your kitchen. But for us 3D artists, the “blender” we care about is the one on our desktops, and becoming a “ninja” with it is the ultimate goal. This isn’t a review of an appliance; it’s a deep-dive review of the workflow that turns you into a Blender ninja—fast, efficient, and deadly effective. Have you ever felt bogged down, waiting for renders, or fighting with clunky modeling steps? Then this is the review you’ve been looking for.
What Exactly is a “Ninja” Blender Workflow?
So, what does it mean to have a “ninja” workflow in Blender? It’s a philosophy of work that prioritizes speed, efficiency, and precision without sacrificing creative quality. It’s about knowing your tools so well that they become an extension of your thoughts, allowing you to move from concept to final render with minimal friction. This approach combines technical knowledge of 3D modeling and rendering with smart habits and a deep understanding of Blender’s core functionalities, from Cycles to Eevee.
Why This Ninja Blender Review Will Change Your Game
Mastering an efficient workflow is not just about finishing projects faster. It’s about freeing up your most valuable resource: creative energy. When you’re not fighting the software, you have more mental space to focus on composition, lighting, texturing, and storytelling.
- Boosts Creativity: Less time on tedious tasks means more time for artistic exploration.
- Increases Productivity: You can take on more complex projects or deliver client work in record time.
- Reduces Frustration: Nothing kills a creative session like a technical roadblock. A ninja workflow helps you slice right through them.
- Improves Final Quality: Efficiency often leads to cleaner geometry, more optimized scenes, and better-looking renders because you have time to iterate and polish.
The Core Recipe: A Step-by-Step Ninja Workflow
Let’s break down the essential steps. Think of this as the core of our Ninja blender review, guiding you through a project from start to finish.
Phase 1: The Sharp Blade of Planning
Before you even touch a single vertex, a ninja plans their attack. This is the most underrated part of the 3D process.
- Gather Your References: Use a tool like PureRef to collect all your concept art, photo references, and inspiration in one place. Don’t just look at them; analyze them. Understand the forms, materials, and lighting.
- Break Down the Scene: Mentally or on paper, deconstruct your project into smaller, manageable assets. What can be reused? What will be the “hero” asset that needs the most detail?
- Establish Your Scale: Set your scene’s units (e.g., meters, inches) from the very beginning. This prevents massive headaches with physics simulations, lighting, and texturing later on.
Phase 2: Modeling with Precision and Speed
This is where your muscle memory and knowledge of hotkeys shine. The goal is clean, efficient geometry, or “good topology.”
- Master the Essentials: Your bread and butter are the basics. Don’t underestimate
G(Grab),R(Rotate),S(Scale),E(Extrude), andTab(Object/Edit Mode). - Use Modifiers Intelligently: Modifiers are your best friends for non-destructive modeling. The most crucial ones are:
- Subdivision Surface: For creating smooth, high-poly surfaces from a simple base mesh.
- Mirror: Cut your work in half for any symmetrical object.
- Bevel: Add realistic, light-catching edges to your models. Use the shortcut
Ctrl+B. - Array: Quickly duplicate objects in a linear or circular pattern.
- Keep Your Topology Clean: Aim for quad-based geometry whenever possible. It subdivides cleanly and works best for texturing and animation. Use Blender’s retopology tools if you’re starting from a messy sculpt.
In my own projects, I find that spending an extra 10% of time on clean topology at the modeling stage saves me 50% of the time I would have spent fixing texturing and shading problems later. It’s a foundational part of any good workflow.
|
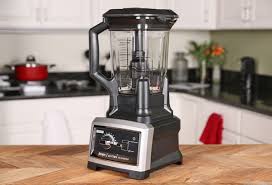
Our Picks for the Best Blender in 2025
As an Amazon Associate, we earn from qualifying purchases.
|
||
| Num | Product | Action |
|---|---|---|
| 1 | Ninja Professional Blender 1000W, Total Crushing Technology- Smoothies, Ice Crushing & Frozen Fruit, Full-Size Countertop Blender, 72-oz. Pitcher, Black & Grey, BL610 |

|
| 2 | Ninja | Blender | Nutri Pro | Single Serve | For Smoothies, Salsa, Shakes and Frozen Drinks | Includes 2 Smoothie Cups & Lids | Crushes Ice, Fruit & Veggies |Silver | BN401 |
|
| 3 | nutribullet Personal Blender, Shakes, Smoothies, Food Prep, and Frozen Blending, 24 Ounces, 600 Watt, Gray, NBR-0601WM |
|
| 4 | BLACK+DECKER PowerCrush Multi-Function Blender with 6-Cup Glass Jar, 4 Speed Settings, Silver |
|
| 5 | Zulay Kitchen Milk Frother Wand Drink Mixer with AA Duracell Batteries- Durable Handheld Milk Frother Electric Whisk - Easy-Clean Milk Frother Wand & Mini Blender - Electric Coffee Frother - Black |
|
| 6 | Magic Bullet Blender, Small, Silver, 11 Piece Set |
|
| 7 | KOIOS Smoothie Blender, 900W Personal Blender for Shakes and Smoothies for Kitchen with 2 No-BPA 22oz Portable Cups, Single Serve Smoothies Maker Mixer for Juices, Nutritious Recipe (Grey Blue) |
|
| 8 | Ninja Blender, Compact Kitchen System, 1200W, 3 Functions for Smoothies, Dough & Frozen Drinks with Auto-IQ, 72-oz.* Blender Pitcher, 40-oz. Processor Bowl & 18-oz. Single-Serve Cup, Grey, AMZ493BRN |
|
| 9 | BlenderBottle Classic V2 Shaker Bottle Perfect for Protein Shakes and Pre Workout, 28-Ounce, Clear/Black |
|
| 10 | BLACK+DECKER 10-Speed Countertop Blender, BL2010BP, 6-Cup Plastic Jar, Dishwasher-Safe, Stainless Steel, Suction Feet |
|
Phase 3: Texturing and Shading—The Secret Sauce
A great model with bad materials is just a great model. A good model with great materials can be photorealistic. Here’s how a ninja approaches it.
- Embrace the Node Editor: The Shader Editor is the heart of material creation in Blender. Don’t be intimidated by the nodes. Start by understanding the Principled BSDF shader; it can create 90% of the materials you’ll ever need.
- Work Procedurally: Whenever possible, try to create materials using Blender’s procedural noise, voronoi, and gradient textures. They are infinitely scalable and offer incredible control.
- Learn UV Unwrapping: This is non-negotiable for applying image textures. Master Blender’s UV editing tools. Use seams (
Mark Seam) to define where your model should be “cut” for flattening. TheSmart UV Projectis a quick fix, but manual unwrapping gives you professional control. - Use the Node Wrangler Addon: If you haven’t enabled it, do it now. Go to
Edit > Preferences > Add-onsand checkNode Wrangler. TheCtrl+Shift+Tshortcut to automatically set up a PBR texture set will change your life.
Phase 4: Rendering—The Final Blend
This is the final step in our Ninja blender review of a perfect workflow. Getting a beautiful render quickly is the ultimate test.
- Choose Your Weapon: Eevee vs. Cycles:
- Eevee: A real-time render engine. It’s incredibly fast and perfect for stylistic work, previews, and projects where absolute photorealism isn’t the top priority.
- Cycles: A path-tracing render engine. It’s slower but delivers physically accurate lighting, reflections, and shadows for true photorealism.
- Optimize Your Scene: A ninja doesn’t waste render time.
- Check Light Paths: In Cycles, lower the
Max BouncesforTotal,Diffuse, andGlossyin the Render Properties. Start with lower values (e.g., 4) and increase only if necessary. - Use Denoising: Blender’s built-in Denoising options (NVIDIA OptiX for NVIDIA GPUs is amazing) allow you to render with fewer samples and still get a clean image.
- Render at a Lower Resolution: Do test renders at 50% resolution to check lighting and composition before committing to a full-size final render.
- Check Light Paths: In Cycles, lower the
Pro Tips for an Even Better Ninja Blender Workflow
Ready to take it to the next level? These advanced tips separate the students from the masters.
Customize Your Workspace
Don’t stick with the default layout if it doesn’t work for you. Create custom workspaces for different tasks—one for modeling, one for shading, one for compositing. Save your custom startup file (File > Defaults > Save Startup File) so Blender always opens exactly how you like it.
What is the Asset Browser?
How do you use the Asset Browser for a faster workflow? The Asset Browser is a game-changer introduced in recent versions. You can save models, materials, and node groups into a personal library and simply drag-and-drop them into any new project. This is the key to building a reusable library and working incredibly fast.
Master Geometry Nodes
Geometry Nodes are the future of procedural modeling in Blender. While they have a learning curve, they allow you to create incredibly complex models and effects that are non-destructive and easily editable. Start with simple tutorials, like scattering objects on a surface.
According to Alex Chen, a senior 3D artist at a major game studio, “The artists who get ahead are the ones who build efficient, non-destructive workflows. The Asset Browser and Geometry Nodes aren’t just fancy features; they are fundamental tools for professional-grade productivity in Blender.”
Common Mistakes That Dull Your Blade
Even ninjas make mistakes. Here are some common workflow traps to avoid.
- Destructive Modeling: Applying modifiers too early locks you out of making easy changes later. Keep things non-destructive for as long as possible.
- Poor Naming Conventions:
Cube.001,Cube.002… this is a recipe for disaster in a complex scene. Name your objects and materials logically (e.g.,Prop_Chair_Leg,Mat_Wood_Oak). - Ignoring File Backups: Use Blender’s
Save Incrementalfeature (File > Save As, then click the+button) to create versions of your file. This can save you from file corruption or a disastrous mistake.
Frequently Asked Questions (FAQ)
Is this Ninja blender review workflow suitable for beginners?
Absolutely. In fact, building these good habits from day one is the best way to start. You don’t have to master everything at once. Begin by focusing on good naming conventions and learning a few essential hotkeys.
How can I make my Blender viewport faster for a smoother workflow?
To speed up the viewport, switch to Solid view mode when modeling complex scenes. You can also use the “Simplify” setting in the Scene Properties to reduce subdivision levels globally or disable heavy effects. In Eevee, lowering shadow quality and disabling effects like Screen Space Reflections can help.
What’s the single most important hotkey for a ninja workflow?
It’s tough to pick just one, but Ctrl+S (Save) is arguably the most important habit. For modeling, the . (period) key on the numpad, which frames the selected object, is a massive time-saver for navigation.
How long does it take to get fast at Blender?
It depends on your dedication. Consistent practice is key. By focusing on an efficient workflow like the one in this Ninja blender review, you can see significant speed improvements within a few weeks of daily practice.
Does this workflow apply to sculpting as well?
Yes, the principles do. Planning and references are crucial for sculpting. Efficiency comes from knowing your brushes, using dynamic topology (Dyntopo) correctly, and having a clear plan for retopology after the sculpt is complete.
Conclusion: Your Path to Mastery
This deep-dive Ninja blender review was never about a kitchen appliance; it was about transforming your relationship with Blender itself. By adopting a workflow that emphasizes planning, efficiency, and smart tool usage, you’re not just learning to use software—you’re learning to be a more effective and creative artist. The techniques we’ve covered, from modeling shortcuts to render optimization, are the building blocks of professional-level work. Now, the best thing you can do is to stop reading, open Blender, and start practicing. Become the ninja.