Hey everyone, it’s your mentor from Blender Aday, back with another deep dive. Have you ever noticed how some of the most challenging things to create in 3D are the most ordinary? Think of a simple glass of water, a soft blanket, or pureed food. Getting these to look right is a true test of skill. Today, we’re tackling that challenge head-on by exploring how to create photorealistic Baby Food Recipes Blender scenes. This project is a fantastic way to master complex materials, lighting, and modeling techniques that will elevate all of your future work.
This isn’t just about making digital fruit puree; it’s a comprehensive workout for your 3D skills. We’ll be touching on everything from hard-surface modeling for the blender itself to advanced material shading with Subsurface Scattering for the food. By the end of this guide, you’ll have the confidence to tackle any complex product visualization scene.
What Exactly is a “Baby Food Recipes Blender” Project?
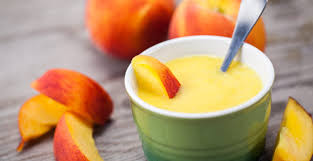
In the context of 3D art, a baby food recipes blender project is a scene focused on creating a photorealistic visualization of a kitchen blender containing freshly made baby food. This involves modeling the blender, the ingredients (like fruits and vegetables), and most importantly, creating a convincing material for the pureed mixture that looks both delicious and organic.
This type of project serves as an excellent benchmark for intermediate artists. It forces you to combine different disciplines: precise hard-surface modeling for the appliance, organic modeling for the food, and sophisticated material work for glass, plastic, and the semi-translucent puree. It’s a portfolio piece waiting to happen.
Why You Should Master This Type of 3D Scene
Why spend your time on this specific project? Because the skills you’ll develop are universally applicable. Mastering a scene like this teaches you the core principles of photorealism that are crucial in many areas of the 3D industry, from advertising to architectural visualization.
- Advanced Material Creation: You’ll move beyond simple PBR shaders and dive deep into creating complex materials with subsurface scattering (SSS), refraction, and roughness maps. This is essential for rendering anything organic, from food to human skin.
- Lighting for Realism: A glass blender filled with a semi-translucent liquid is a lighting nightmare if you don’t know what you’re doing. This project will teach you how to use HDRI environments and key lights to create beautiful, realistic reflections and caustics.
- Composition and Storytelling: A great render isn’t just technically perfect; it tells a story. We’ll touch on how to arrange your scene—the ingredients on the counter, a splash of water—to create a compelling image that feels lived-in and authentic.
A Step-by-Step Guide to Your First 3D Baby Food Scene
Alright, let’s fire up Blender and get our hands dirty. For this guide, we’ll focus on the core workflow. I’ll be using Cycles for its rendering superiority with glass and SSS, but many of these steps apply to Eevee as well.
Step 1: Modeling the Blender Jar
The foundation of our baby food recipes blender scene is the blender itself. We’ll focus on the glass jar, as it’s the hero of the shot.
- Gather References: Never model from memory. Search for images of a simple, modern blender. Pay attention to the thickness of the glass, the shape of the base, and the details on the lid.
- Start with a Cylinder: In the 3D Viewport, press
Shift + Aand add a Cylinder. In the operator panel that appears in the bottom-left, give it around 16 or 24 vertices. We don’t need it to be overly dense yet. - Shape the Jar: Tab into Edit Mode. Use
Loop Cut(Ctrl + R) to add edges and scale them (S) to match the contour of your reference image. UseProportional Editing(O) to create smooth, organic curves. - Add Thickness: Once you have the outer shape, add a Solidify modifier. This is the non-destructive way to give the glass real-world thickness, which is critical for realistic light refraction. Adjust the Thickness value until it looks right.
- Bevel the Edges: Nothing in the real world has perfectly sharp edges. Add a Bevel modifier to catch those beautiful highlights. A small amount with 2 or 3 segments is usually enough. Make sure to apply Shade Smooth to the object.
Step 2: Creating the Puree Material in the Shader Editor
This is where the magic happens. The food material will make or break your render.
- The Principled BSDF Node: This is our starting point. Select your puree mesh (which can be a separate object inside the blender jar) and create a new material.
- Subsurface Scattering (SSS): This is the most important setting. Find the Subsurface input on the Principled BSDF node and increase it to a value like
0.5or higher. This tells Cycles that light should penetrate the surface and scatter inside, giving it that soft, fleshy look. - Choosing the Right Color: Set the Base Color to a rich, organic color, like a deep orange for carrots or a vibrant green for peas. Then, set the Subsurface Color to a slightly lighter, more saturated version of that same color. This mimics how light behaves in real food.
- Tweak the Roughness: Most purees are not perfectly glossy. Increase the Roughness to around
0.3or0.4to get a soft, satin-like sheen instead of a hard reflection.
In my professional projects, I find that the Random Walk SSS method often gives the most realistic results for food and skin. You can change this under the Material Properties tab in the Render Properties panel.
|
Our Picks for the Best Blender in 2025
As an Amazon Associate, we earn from qualifying purchases.
|
||
| Num | Product | Action |
|---|---|---|
| 1 | Magic Bullet Blender, Small, Silver, 11 Piece Set |

|
| 2 | Ninja Professional Blender 1000W, Total Crushing Technology- Smoothies, Ice Crushing & Frozen Fruit, Full-Size Countertop Blender, 72-oz. Pitcher, Black & Grey, BL610 |
|
| 3 | Ninja Blender, Compact Kitchen System, 1200W, 3 Functions for Smoothies, Dough & Frozen Drinks with Auto-IQ, 72-oz.* Blender Pitcher, 40-oz. Processor Bowl & 18-oz. Single-Serve Cup, Grey, AMZ493BRN |
|
| 4 | BlenderBottle Classic V2 Shaker Bottle Perfect for Protein Shakes and Pre Workout, 28-Ounce, Clear/Black |
|
| 5 | BLACK+DECKER PowerCrush Multi-Function Blender with 6-Cup Glass Jar, 4 Speed Settings, Silver |
|
| 6 | Ninja | Blender | Nutri Pro | Single Serve | For Smoothies, Salsa, Shakes and Frozen Drinks | Includes 2 Smoothie Cups & Lids | Crushes Ice, Fruit & Veggies |Silver | BN401 |
|
| 7 | BLACK+DECKER 10-Speed Countertop Blender, BL2010BP, 6-Cup Plastic Jar, Dishwasher-Safe, Stainless Steel, Suction Feet |
|
| 8 | nutribullet Personal Blender, Shakes, Smoothies, Food Prep, and Frozen Blending, 24 Ounces, 600 Watt, Gray, NBR-0601WM |
|
| 9 | Zulay Kitchen Milk Frother Wand Drink Mixer with AA Duracell Batteries- Durable Handheld Milk Frother Electric Whisk - Easy-Clean Milk Frother Wand & Mini Blender - Electric Coffee Frother - Black |
|
| 10 | KOIOS Smoothie Blender, 900W Personal Blender for Shakes and Smoothies for Kitchen with 2 No-BPA 22oz Portable Cups, Single Serve Smoothies Maker Mixer for Juices, Nutritious Recipe (Grey Blue) |
|
Step 3: Lighting and Rendering the Scene
Your amazing models and materials won’t shine without proper lighting.
- Use an HDRI: An HDRI (High Dynamic Range Image) provides realistic ambient light and reflections. Go to World Properties, click the yellow dot next to Color, and choose Environment Texture. Load an HDRI of an interior scene, like a kitchen, for believable results.
- Add a Key Light: The HDRI provides fill light, but you need a main light source to create shape and shadows. Add an Area Light (
Shift + A > Light > Area). Scale it up, position it to one side of your scene, and adjust the power until you have a nice highlight on your blender. - Camera Setup: Add a camera (
Shift + A > Camera) and position it for a pleasing composition. I often like to use a longer focal length, like 85mm, to flatten the perspective slightly and give it a professional, product-shot feel. Enable Depth of Field in the camera settings and pick an empty to use as a focus target to draw the viewer’s eye.
Pro Tips for Next-Level Baby Food Recipes Blender Renders
Once you’ve got the basics down, here are a few techniques the pros use to push their scenes even further.
How Can I Make the Glass Look More Realistic?
To make glass look real, focus on imperfections. In the Shader Editor for your glass material, mix in a subtle noise or grunge texture map into the Roughness input. This will create microscopic smudges and variations, breaking up the perfect reflections and making the glass feel tangible. Also, ensure your IOR (Index of Refraction) is set correctly; a value of 1.450 is a good starting point for common glass.
Use Procedural Textures for Ingredients
Instead of UV unwrapping every single fruit or vegetable, use Blender’s powerful procedural texture nodes. You can create incredibly complex and realistic shaders for things like apple skin or a carrot’s surface by combining Noise, Musgrave, and Voronoi textures. This is a non-destructive and infinitely scalable workflow, perfect for creating variations in your baby food recipes blender project.
Common Mistakes to Avoid
I see a lot of talented artists make these simple mistakes. Avoiding them will put you way ahead of the curve.
- Glass is Too Perfect: As mentioned above, perfectly clean, distortion-free glass looks fake. Add smudges and subtle warping.
- Lighting is Too Flat: Don’t be afraid of shadows. Contrast is what gives an image depth and drama. A single, strong light source is often more effective than multiple, weaker lights that wash everything out.
- Ignoring a Background: Don’t render your beautiful blender in a gray void. Place it on a simple plane with a wood or marble texture. Add a few out-of-focus ingredients in the background to complete the story. A well-executed baby food recipes blender scene feels like a snapshot from a real kitchen.
Practical Applications in the 3D World
The skills honed in this tutorial are directly transferable to high-paying jobs in the 3D industry. Product visualization is a massive field, and companies are always looking for artists who can create mouth-watering renders of their products. Whether it’s for a print ad, an online commercial, or an interactive web experience, the ability to make something look real and appealing is invaluable.
Alex Chen, a senior 3D artist I know from the advertising world, puts it best: “Clients don’t buy a 3D model; they buy a feeling. When you’re rendering food, you’re not selling a mesh and a texture, you’re selling ‘delicious.’ Your job is to make the viewer hungry through your lighting and shading.”
Frequently Asked Questions
Q: Which render engine is better for a baby food recipes blender scene, Cycles or Eevee?
A: For ultimate realism, especially with glass refraction and accurate subsurface scattering, Cycles is the superior choice. However, Eevee can produce excellent results much faster if you use techniques like Screen Space Reflections and enable SSS in the render settings.
Q: How do I create realistic condensation on the outside of the blender jar?
A: The best way is to use a particle system. Create a small droplet object, then use a particle system on the glass jar to scatter thousands of these droplets across the surface. Control the density with a weight map to make it look natural.
Q: My render is very noisy, especially around the food. How do I fix this?
A: Noise in scenes with SSS is common. The primary solution is to increase the render samples. In Cycles, also be sure to enable the Denoising option in the Render Properties. The OpenImageDenoise node in the Compositor is incredibly powerful for cleaning up a final image.
Q: Can I animate the ingredients blending inside?
A: Absolutely! This would involve fluid simulation using Mantaflow. You would model the solid ingredients, then have them act as an inflow source for a fluid simulation within the blender jar domain, which is a more advanced but incredibly rewarding project.
Q: What is the best way to model the ingredients like fruits and vegetables?
A: For organic shapes, sculpting is often the best approach. Start with a basic mesh, switch to Sculpt Mode, and use tools like the Grab, Inflate, and Crease brushes to create a natural-looking shape. Then, retopologize it for a clean final mesh.
Conclusion: Your Journey to Photorealism
We’ve covered a lot of ground today, from the fundamental modeling of the jar to the nuanced art of material creation and lighting. Creating a convincing baby food recipes blender scene is a challenging but immensely satisfying project. It combines technical precision with artistic intuition, and the skills you learn here will become a core part of your 3D toolkit.
So, take what you’ve learned, find some great reference images, and start creating. Don’t be afraid to experiment and fail. Every render, even the ones that don’t turn out perfectly, is a step forward. I can’t wait to see the amazing work you all produce. Keep creating, and as always, happy blending.