Hey everyone, your friendly neighborhood artist from Blender Aday here. Today, we’re diving into a project that’s both technically challenging and creatively rewarding: bringing Vegan Recipes Blender scenes to life in stunning 3D. If you’ve ever scrolled through a food blog or a high-end commercial and wondered how they create those perfect, mouth-watering visuals of smoothies and fresh ingredients, you’ve come to the right place. The secret often isn’t just photography; it’s the magic of 3D rendering, and we’re going to break down exactly how you can create your own photorealistic kitchen scene.
What is a ‘Vegan Recipes Blender’ Scene in 3D?
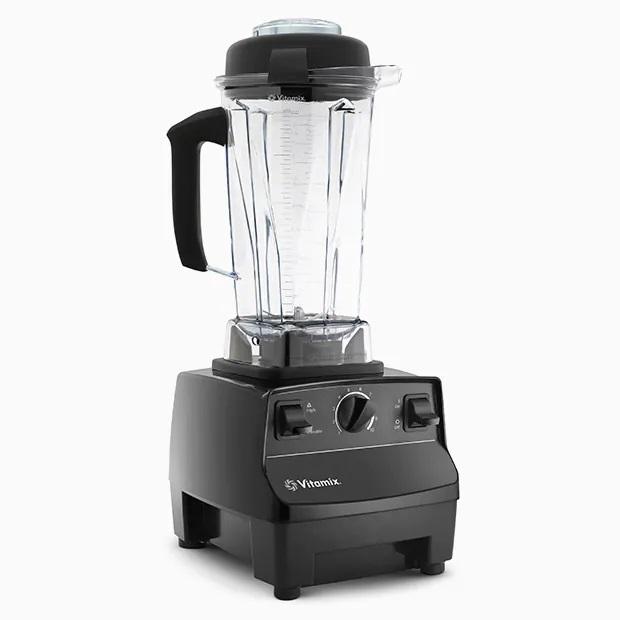
In the context of Blender, a “vegan recipes blender” scene is a complete 3D project focused on creating a photorealistic depiction of a kitchen blender in action, filled with plant-based ingredients like fruits, vegetables, and liquids. This isn’t just about modeling a single object. It’s a comprehensive exercise that combines hard-surface modeling, organic sculpting, procedural texturing, complex liquid simulation, and advanced lighting to create a final image that looks good enough to eat.
Why You Should Master This 3D Project
Tackling a project like this is a fantastic way to level up your entire skillset. Why? Because it forces you to master several core pillars of 3D art at once. You’re not just making a shiny appliance; you’re learning how light interacts with glass, how liquids splash and swirl, and how to create the subtle, imperfect textures that make a piece of fruit look real. In my experience, completing a complex still-life project like this is one of the best portfolio builders for any aspiring 3D artist. It demonstrates a mastery of both technical and artistic fundamentals.
The Ultimate Guide to Your Vegan Recipes Blender Scene
Alright, let’s fire up Blender and get our hands dirty. We’ll break this down into a manageable, step-by-step workflow.
Step 1: Modeling the Blender Appliance
The foundation of our scene is the blender itself. This is primarily a hard-surface modeling task.
- Gather Reference: Before you add a single vertex, find high-quality reference images of the blender model you want to create. Pay attention to seams, buttons, and the thickness of the glass pitcher.
- Blockout the Shapes: Start with basic primitives like cylinders and cubes to establish the main proportions of the base, the pitcher, and the lid. Don’t worry about details yet.
- Refine with Subdivision Modeling: Add a Subdivision Surface modifier to your main shapes. Use support loops (Ctrl+R) and edge creasing (Shift+E) to define sharp edges and smooth curves. This is the classic workflow for creating clean, high-poly models.
- Add the Details: Model the buttons, the blade assembly, and any rubber or plastic seals. Use Boolean modifiers for cuts and insets, but be sure to clean up the resulting geometry to avoid shading artifacts.
Step 2: Crafting Your Vegan Ingredients
Now for the fun part: the food! This is where we shift from precise modeling to a more organic approach.
- Fruits and Veggies: For items like strawberries or bananas, you can start with a basic shape and use Blender’s Sculpt Mode to add organic details and imperfections. For leafy greens like spinach, a simple plane with some displacement and a Solidify modifier works wonders.
- Procedural Texturing: The key to realistic food is the texture. Instead of relying solely on image textures, dive into the Shader Editor. You can use a combination of Noise and Voronoi textures, plugged into the color, roughness, and bump channels of a Principled BSDF shader, to create everything from the subtle dimples on a strawberry to the waxy skin of an apple.
Step 3: The Magic of Liquid Simulation
Creating the smoothie itself is where many artists get stuck. But Blender’s Mantaflow physics engine is incredibly powerful.
- Set Up the Domain: Create a cube that encompasses the entire area where the liquid will exist. In the Physics Properties, set it to be a Fluid domain with the type set to Liquid.
- Create the Inflow: The liquid needs a source. You can use a small sphere inside the blender pitcher, set as a Fluid object with the type Flow and a Flow Behavior of Inflow. This will continuously emit fluid particles.
- Define the Obstacles: The blender pitcher and the blades must be set as Fluid objects with the type Effector and a Surface Thickness value to prevent liquid from leaking through.
- Bake the Simulation: In the Domain settings, you’ll find the Bake Data button. Liquid simulations are computationally intensive, so Blender needs to pre-calculate the physics.
Pro Tip: For a thick smoothie, increase the Viscosity value in the Domain settings. A higher value will make the liquid flow more slowly and clump together, just like a real smoothie.
|
Our Picks for the Best Blender in 2026
As an Amazon Associate, we earn from qualifying purchases.
|
||
| Num | Product | Action |
|---|---|---|
| 1 | BLACK+DECKER 10-Speed Countertop Blender, BL2010BP, 6-Cup Plastic Jar, Dishwasher-Safe, Stainless Steel, Suction Feet |

|
| 2 | nutribullet Personal Blender, Shakes, Smoothies, Food Prep, and Frozen Blending, 24 Ounces, 600 Watt, Gray, NBR-0601WM |
|
| 3 | Ninja Blender, Compact Kitchen System, 1200W, 3 Functions for Smoothies, Dough & Frozen Drinks with Auto-IQ, 72-oz.* Blender Pitcher, 40-oz. Processor Bowl & 18-oz. Single-Serve Cup, Grey, AMZ493BRN |
|
| 4 | KOIOS Smoothie Blender, 900W Personal Blender for Shakes and Smoothies for Kitchen with 2 No-BPA 22oz Portable Cups, Single Serve Smoothies Maker Mixer for Juices, Nutritious Recipe (Grey Blue) |
|
| 5 | BLACK+DECKER PowerCrush Multi-Function Blender with 6-Cup Glass Jar, 4 Speed Settings, Silver |
|
| 6 | BlenderBottle Classic V2 Shaker Bottle Perfect for Protein Shakes and Pre Workout, 28-Ounce, Clear/Black |
|
| 7 | Zulay Kitchen Milk Frother Wand Drink Mixer with AA Duracell Batteries- Durable Handheld Milk Frother Electric Whisk - Easy-Clean Milk Frother Wand & Mini Blender - Electric Coffee Frother - Black |
|
| 8 | Ninja | Blender | Nutri Pro | Single Serve | For Smoothies, Salsa, Shakes and Frozen Drinks | Includes 2 Smoothie Cups & Lids | Crushes Ice, Fruit & Veggies |Silver | BN401 |
|
| 9 | Magic Bullet Blender, Small, Silver, 11 Piece Set |
|
| 10 | Ninja Professional Blender 1000W, Total Crushing Technology- Smoothies, Ice Crushing & Frozen Fruit, Full-Size Countertop Blender, 72-oz. Pitcher, Black & Grey, BL610 |
|
Step 4: Shading and Lighting for Realism
A great model can be ruined by poor lighting. Your goal here is to replicate a realistic environment, like a bright kitchen.
- Glass Shader: For the blender pitcher, don’t just use a transparent shader. Use the Principled BSDF with the Transmission value set to 1.0. Lower the Roughness to make it clear, and play with the IOR (Index of Refraction) value—around 1.45 is good for glass.
- Subsurface Scattering (SSS): This is the secret to making fruits and liquids look soft and not like hard plastic. On your ingredient shaders, increase the Subsurface value in the Principled BSDF. This allows light to penetrate the surface and scatter, which is crucial for things like grapes, berries, and leafy greens.
- Lighting: An HDRI (High Dynamic Range Image) is your best friend. Find an HDRI of a kitchen or studio interior and use it in your World Properties to get realistic global illumination and reflections. You can then add a few Area Lights to act as key and fill lights to further define the shapes.
Pro Tips for Hyper-Realistic Vegan Recipes in Blender
Ready to push your render from good to great? These advanced techniques will make all the difference.
Nailing the Imperfections
Nothing in the real world is perfect. Add subtle fingerprints to the glass using a roughness map. Add tiny scratches to the plastic base. Place a few water droplets on the side of the pitcher using a particle system. These small details sell the realism of the scene.
Mastering Composition
Don’t just place your blender in the center of the frame. Use the Rule of Thirds by placing your main subject off-center. Enable Depth of Field in your camera settings and set the focus on a specific point, like a strawberry on the rim of the pitcher. This cinematic effect draws the viewer’s eye and adds a professional touch.
As our friend Alex Chen, a senior 3D artist at a major visualization studio, often says: “Realism isn’t in the big shapes; it’s in the dust, the scratches, and the smudges. The story is told in the imperfections.”
Common Mistakes to Avoid in Your Render
- Flat Lighting: Using only one light source often creates harsh shadows and a boring image. Always use a combination of an HDRI for ambient light and at least one or two area lights to shape your subject.
- Perfectly Clean Glass: The default glass shader is too perfect. Real glass has subtle smudges and variations in roughness. Mix your glass shader with a transparent shader using a fingerprint texture as the mix factor.
- Unrealistic Liquid: If your smoothie looks like water, you’ve forgotten to adjust the viscosity. If it’s exploding out of the blender, your simulation resolution might be too low or your inflow velocity too high. Always bake at a low resolution first to test the general motion before committing to a final, high-resolution bake.
Frequently Asked Questions
What is the best render engine for a vegan recipes blender scene?
For ultimate realism, Cycles is the way to go. Its path-tracing engine accurately calculates how light bounces, which is essential for realistic glass, liquids, and subsurface scattering. Eevee can give you a quick preview but will struggle to match the physical accuracy of Cycles for a scene like this.
How can I make the smoothie look thick and textured?
The key is a combination of physics and shading. In the Mantaflow settings, increase the base viscosity and add some diffusion to get a thicker consistency. In the shader editor, use a Noise texture plugged into the Bump or Displacement node to add fine, pulpy texture to the liquid’s surface.
What is the best way to add condensation to the outside of the pitcher?
You can achieve this with a particle system. Create a small droplet model. Then, select your blender pitcher, add a particle system, and set it to Hair. Under the Render settings, choose to render it as your droplet Object. Use a vertex group to control where the droplets appear.
Can I animate the entire blending process?
Absolutely! You can keyframe the Flow object’s activity to turn the liquid on and off. You can also add a Turbulence force field inside the domain and animate its strength to simulate the churning motion of the blades. This adds a whole new level of complexity and dynamism to your vegan recipes blender project.
How do I make the fruit ingredients look wet?
This is a great shading trick. In the Shader Editor, use a Clearcoat layer on your Principled BSDF. Increasing the Clearcoat value adds a thin, reflective layer on top of the base material, perfectly simulating a wet surface without altering the underlying fruit texture.
Conclusion
Creating a photorealistic vegan recipes blender scene is more than just a 3D exercise; it’s a digital art project that hones your observation skills and technical abilities. By mastering modeling, texturing, simulation, and lighting, you not only create a beautiful portfolio piece but also gain a versatile skillset applicable to product visualization, advertising, and beyond. So go ahead, give it a shot. I can’t wait to see the delicious renders you all cook up. Keep creating, and I’ll see you in the next one.